


Designing a walk-in space from a tub conversion creates a new floor layout with edges, drains, and a step-through opening. Your bath mat needs precise cutouts around hazards to keep footing secure.
Wondering how to select, template, and trim a bath mat cut to fit that opening without gaps or bunching?
In this 2026 guide, you’ll learn how to plan drain and threshold cut-outs, choose materials that trim cleanly, finish edges, and maintain grip in a converted walk-in shower-bathtub combo.
Safer footing: precise openings
A tub-to-shower conversion replaces a tall curb with a step-through cut-out. That new threshold, plus the drain and corners, introduces slip hot-spots. A mat trimmed with targeted cutouts anchors grip where shoes and bare feet actually land.
- Place coverage over the step-in opening and inside landing zone.
- Add a drain cut-out so water flows without pooling under the mat.
- Notch around seats, rails, or posts without lifting corners.
- Maintain a straight leading edge at the threshold to reduce trips.
Template first with paper or painter’s tape before cutting the mat. It’s easier to adjust on paper than re-trim rubber.
Unlike rectangular mats, a cut-to-fit layout follows the conversion’s geometry. It locks in place, reduces snag points, and channels water to the drain through purpose-made openings.

Accurate sizing: template the threshold
Measure three things: threshold width, depth into the tub floor, and drain centerline. Conversions vary by tub material (steel, cast iron, acrylic), so confirm the actual step-through opening before you cut.
- Record inside landing length to place the front mat edge.
- Mark the drain diameter and offset from walls.
- Note any slope; trim the mat to sit flat across pitches.
- Check door swing or curtain clearance at the opening.
| Typical opening range | Mat cut pattern advice |
|---|---|
| ~18–26 in wide; ~7–10 in deep | Keep a straight edge along the lip; ease corners with 10–15 mm radii. |
| Drain: 3–4.5 in diameter | Cut a centered circle; add 4–6 radial slots for fast flow if needed. |
A paper template lets you test U-, L-, or C-shaped cut-outs around benches or rails before you ever touch the mat.
Prefer warm, slatted surfaces over soft foam? Explore natural slatted options that can be trimmed to follow your opening while still draining freely.
Confirm clearances with the transfer bench or shower chair in place. A tight notch can snag legs or seat posts.
Trimmable materials: grip and stability
Choose a mat that cuts cleanly, resists curling at trimmed edges, and maintains friction on a wet, sloped floor. Rubber and EVA offer firm traction; PVC is easy to trim; teak-style grids deliver fast drainage with rigid support.
- Rubber: strong grip, moderate cut resistance, durable edges.
- EVA/PVC: easiest to cut, lighter, needs edge sealing to avoid fray.
- Slatted composites: fast drain, require precise notch alignment.
- Anti-slip texture: look for raised suction zones underfoot.
Cut with a fresh utility blade against a hardboard backing. Make multiple light passes; don’t force a single deep cut.
If you’re still comparing finishes and pile heights, browse curated bathroom mat selections that balance traction with quick drying for walk-in layouts.
Heavier mats resist drift during shower spray. Aim for a weight that feels planted but is still easy to lift for cleaning.
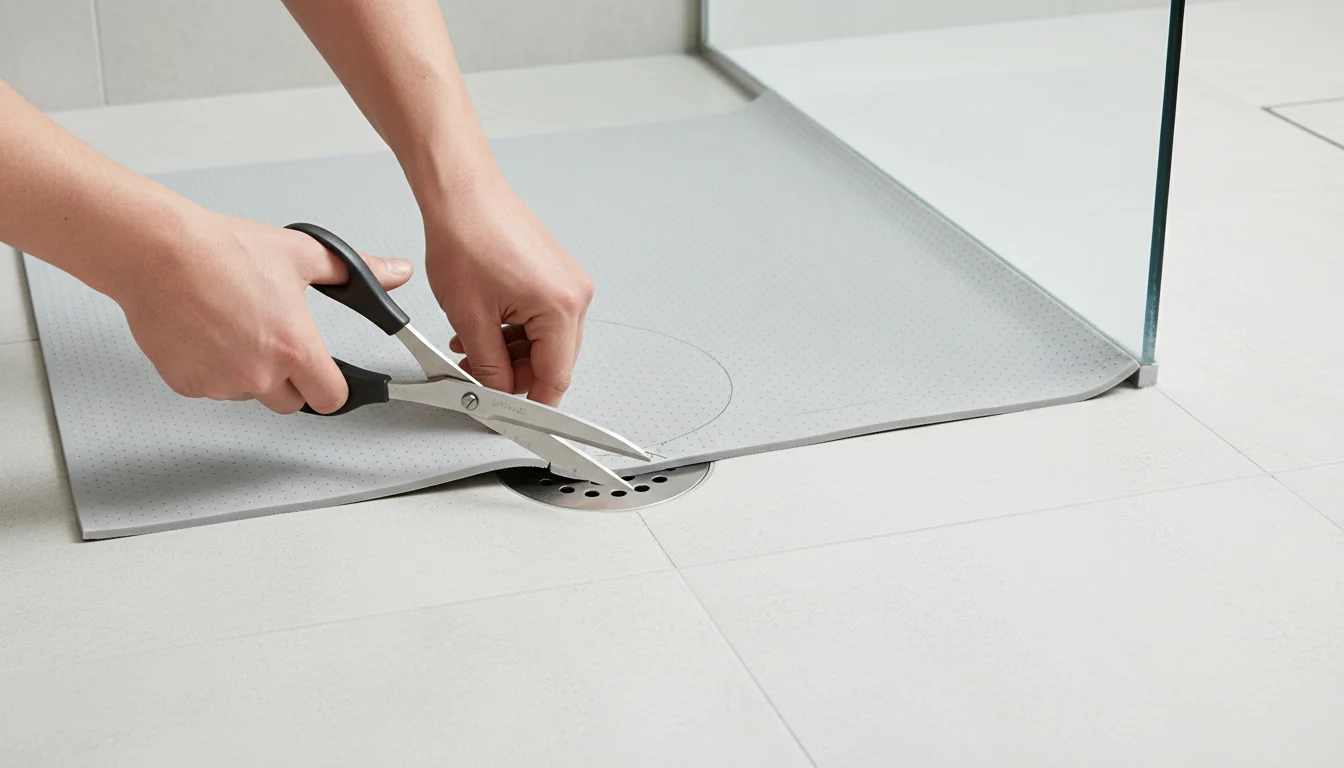
Edge finishing: clean cut-out perimeters
A mat’s cut edge is its weak point. Sharp corners can lift, and rough cuts collect soap film. Finish edges so your threshold notch stays flat and sanitary over time.
- Round every corner; avoid 90° tips that catch toes.
- Seal foam-like cores with clear flexible sealant.
- Deburr rubber/PVC cuts with fine sandpaper or a deburring tool.
- Add thin non-slip strips under trimmed edges if needed.
Never overlap the mat onto a hinged door area. Water can wick under and reduce suction at the step-through.
Need broader coverage inside a long tub-shower? See this selection of generous formats that still allow drain and threshold cut-outs without bunching.
Rinse after every use and hang to dry. Weekly, wipe cut edges first—film accumulates fastest there.
Seating and transfer: matching the notch
Transfer benches and shower chairs often include a U-shaped cut-out seat. Your floor mat should echo that geometry, so legs and tips sit flat while the user can pivot safely through the opening.
- Template around each foot; mark exact positions before trimming.
- Leave 5–10 mm gap around posts to avoid stress tears.
- Create a shallow channel under the seat front for water run-off.
- Check sit-to-stand path: no raised lips or curled corners.
A small rear drain slot behind the bench prevents under-mat puddles, improving hygiene and drying time.
For households sharing the space, keep a second, uncut mat outside the shower for staging, and reserve the trimmed mat strictly for inside the step-in zone.
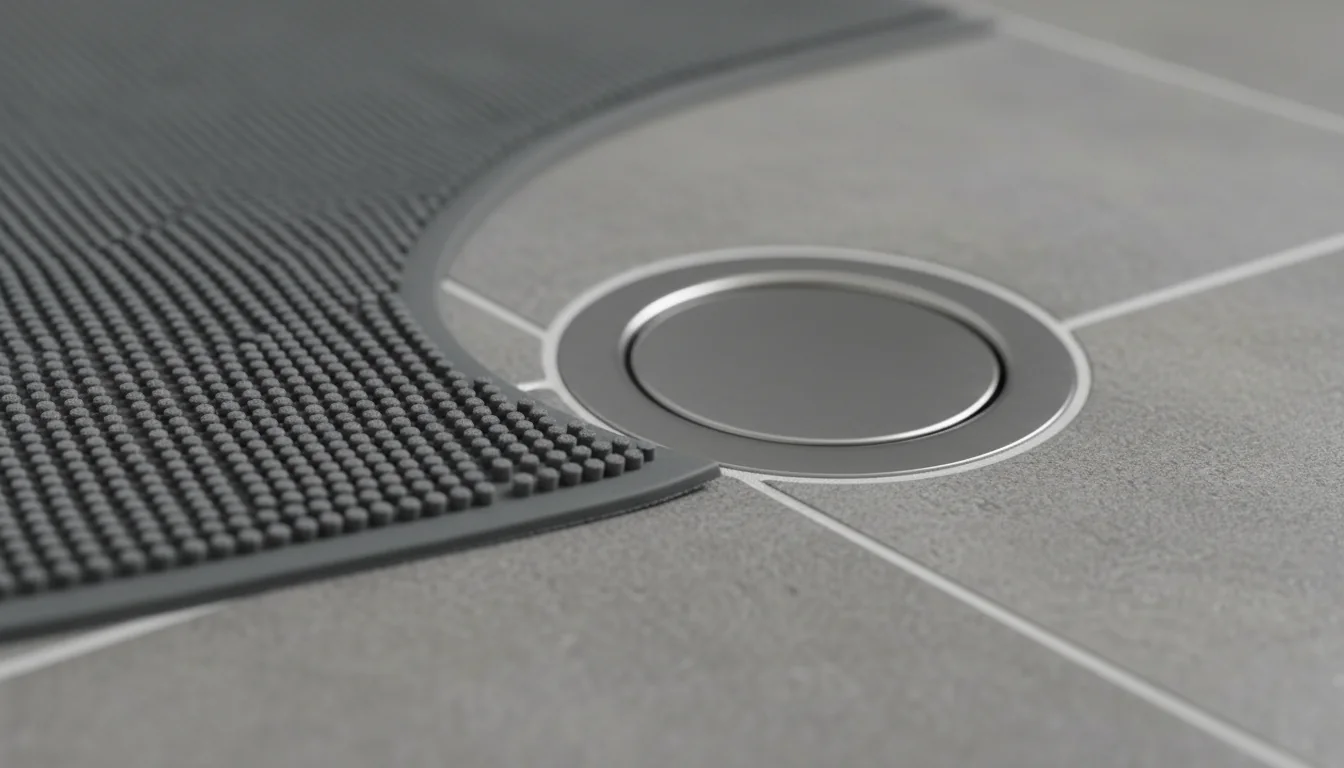
Troubleshooting: drains, slopes, textures
Converted tubs can have subtle slope changes. Textured floors and deep drains challenge suction and drainage. Solve issues with pattern tweaks rather than larger cuts that reduce coverage.
- If suction fails on a textured base, choose heavier mats or micro-cup undersides.
- Offset the drain cut-out slightly in the flow direction to speed water exit.
- Add small relief notches at high spots to prevent rocking.
- Use thin anti-slip strips under the front edge if spray lifts it.
Don’t block weep channels near the drain or threshold. Keep cut-outs clear so water doesn’t back up under the mat.
If the tub wall is thick from a liner, expect a deeper step. Extend the mat slightly farther inward so the first footfall lands on secure traction.
Guide 2026: cut and fit your mat
For walk-in conversions, a low-profile mat with a stable texture is ideal. See an example of a slim, drain-ready format in this streamlined option as you plan your sizing.
- Map the opening, drain, and obstacles with painter’s tape.
- Transfer tape outlines to paper; refine curves and radii.
- Lay the paper on the mat; trace and double-check alignment.
- Score lightly several times; test-fit; then finish edges.
- Rinse, place, and step-test while wet to confirm grip.
Label the mat underside with arrows for drain direction and “threshold” so anyone can replace it correctly after cleaning.
Prefer a versatile rectangle before trimming? Consider a multi-zone format you can adapt with a step-through notch and a precise drain cut-out.
Think “mat cut-to-fit cutouts” as a system: template, trim, finish, and test under running water.
Why focus on cutouts for a walk-in layout?
The step-through opening and drain reshape foot traffic. Purpose-made cut-outs keep edges flat, let water pass, and align traction with your first step, reducing slips at the threshold.
How do cut-outs compare to a standard rectangle?
A plain rectangle can bunch at the opening or cover the drain. A trimmed mat hugs the notch and leaves a clean drain aperture. See a grippy, low-profile style like this anti-slip variant as a starting point.
What are the key advantages of threshold cut-outs?
They reduce trip edges, improve drainage, and stabilize footing where you step in. Properly finished perimeters also resist curling, which maintains suction and hygiene.
Will cut-outs suit a shared family tub-shower?
Yes—use a removable, trimmed insert inside and keep a dry staging mat outside. A modular size like this walk-in format adapts well to mixed routines.
How do I maintain cut edges and the drain aperture?
Rinse after each use and weekly clean edges first. If the material is porous, seal with a flexible, clear edge coat. Keep the drain cut-out free of soap film to preserve flow.
Any sizing errors to avoid with drain cut-outs?
Don’t oversize the hole. Match the drain diameter and add small relief slots only if water lingers. Too-large openings reduce support near the center of the mat.
Cut-to-fit planning turns a basic mat into targeted safety for a walk-in conversion, with drain and threshold cut-outs that track your exact step path.
- Template first around the step-through opening and drain.
- Choose materials that trim cleanly and keep suction.
- Finish edges so perimeters stay flat and sanitary.
If you like warmer textures in wet zones, a slatted surface such as this wood-look grid can be trimmed to follow the notch while draining efficiently.
0 comments